How to Recover Deleted Photos on Android?
We’ve all unintentionally erased photos on our phones once or twice in our lifetime, however considering the worst possibility that you erase something totally irreplaceable? Just Relax you don’t need to freeze or panic, and what you have to do exactly is to recover the erased photos. For this you need is to move quickly. Follow the means referenced underneath, and chances are high you could recover the erased photo without any difficulty. Do note, in any case, that you recover the file, it is complicated but it is effective and successful. You will be able to successfully recover deleted photos on android by following the below-mentioned guide.
How to Recover Deleted Photos on Android?
Methods to Recover Your Deleted Photos
There are various methods by which you can recover your photos. Here are some methods you should follow to recover the deleted photos:
- Recover through the app.
- Recover through the Android photo recovery Trash.
1. Recover Photos through Apps:
There are a few applications that guarantee to recover erased pictures on Android cell phones. While a large number of them don’t work, we have discovered that there is an app that works like a charm to recover your photos called DiskDigger photo recovery app. DiskDigger was more dependable, yet was less meddling when it came to presenting promotions, as well. Do note, that the apparatus works better on rooted phones.
Note: You can attempt to recuperate erased photographs without rooting yet results could differ.
Disk Digger App:
This app really helps you to recover the photos. You just need to relax and follow the steps below precisely and you will get the desired results.
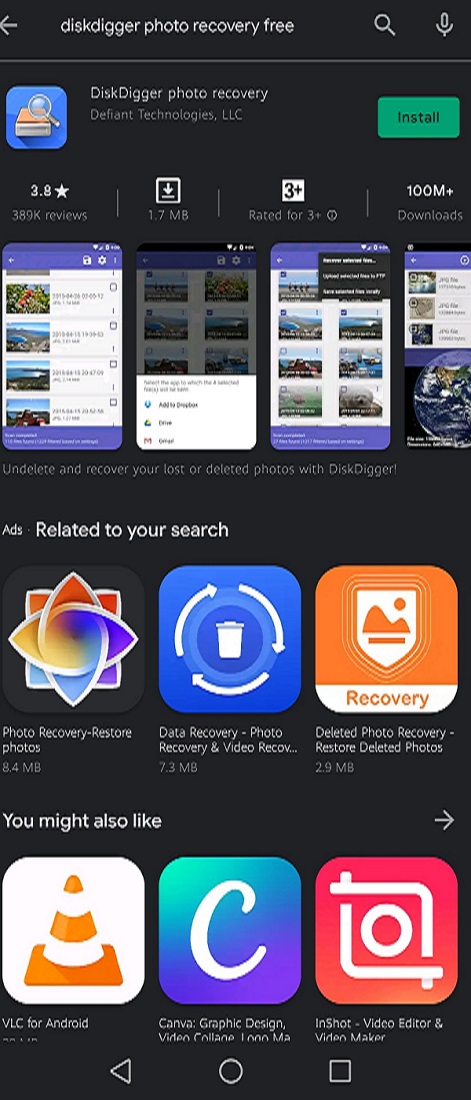
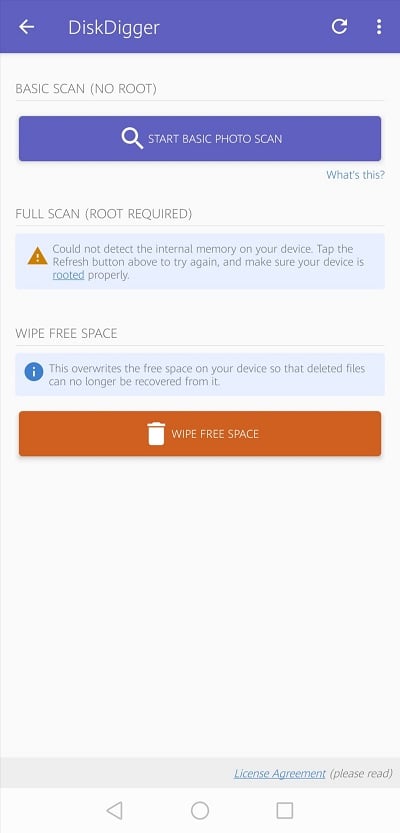
Step 1: Download the app:
First, go to play store. Search the app by the name ”DiskDigger” app. Download it and run it.
Step 2: Run the Process:
Open the app and start the basiz scan. You can also click on the three vertical dots dot on right corner and set the time period.For instance you deleted the picture last month or the last six months.
 After
After
After that the app will start scaning and you will be able to see the picture sthat you have recently deleted.
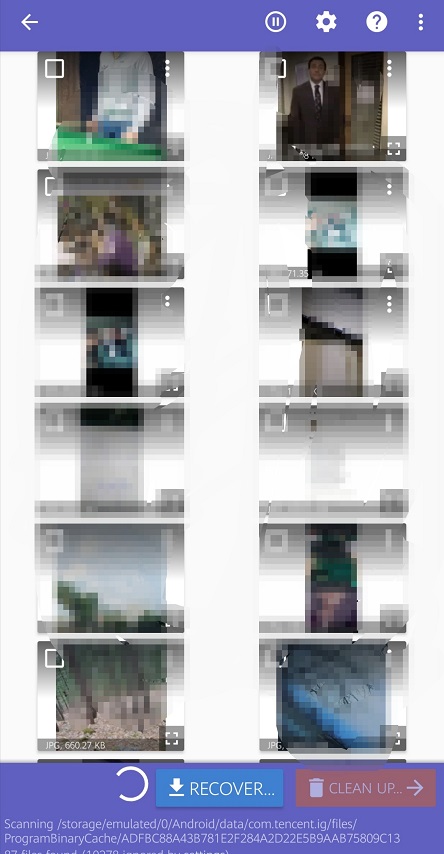
Click on the recover and then download the picture and congratulations its done.
Step 3: Wi-Fi and Mobile Data
It’s useful when you have the application. Wi-Fi and data connection on your phone. The main reason to do this is that when the information is erased, regardless of whether photographs, music or files, it isn’t really erased until something has been composed over it in the device’s memory. Moreover, it is important that you cripple all your phone cleaning applications quickly, as these may for all time erase the records you’ve accidentally erased, making them difficult to recuperate or recover.
Note: On a non-rooted device, DiskDigger is restricted to recuperating pictures from your thumbnail cache, which implies that the pictures will probably be of a lower quality than the first photographs or recordings. Recovering the full-resolution of the photographs or recordings is just conceivable by establishing your device, and getting the Pro form of the application. In the event that you don’t have a clue how to root your phone, at that point allude to our total guide on the best way to attach Android to begin.
In the event that you’ve recently erased your photographs, DiskDigger ought to have the option to discover those photographs, and you’ll be given the choice of whether to reestablish them to a folder on your device or back them up to a cloud service.
From the outset, it didn’t seem as though DiskDigger could discover our photographs, yet a speedy dunk into its settings and unchecking the base document size factor uncovered our erased pics. As we said above, on the off chance that you need to recuperate your photographs, you will require the Pro form of the application, which is accessible at the connection underneath. Under $4 is a little cost to pay to get your recollections back.
Be cautious that if you utilize the cleanup is included in the application, as certain clients have erased all their photographs since they didn’t comprehend that it would erase everything, not simply the pictures they erased intentionally to save space.
Whenever you’ve recovered your photographs, you’ll need to ensure this never happens again. Furthermore, after putting too much effort it is better to be careful in the future than to go through all this over and over again.
2. Recover through the Android photo recovery Trash
Since we’ve explained every chunk of the information on how to recover erased photographs on Android, the subsequent stage is to keep the present circumstance from happening again. To do this, we suggest utilizing an application, for example, Google Photos. It offers limitless photograph stockpiling inasmuch as the documents aren’t too enormous and the reinforcement work is not difficult to set up.
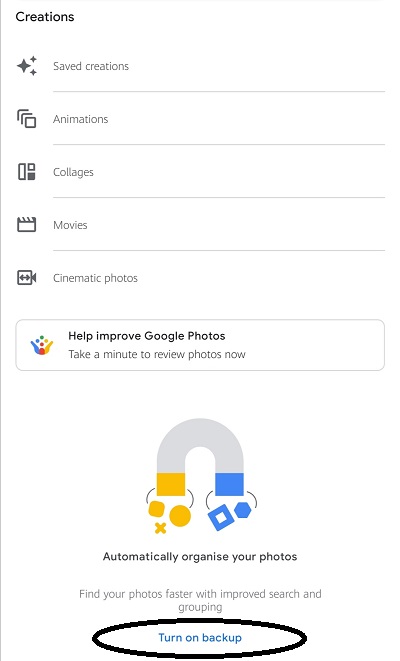
Whenever you’ve introduced the application simply go to its Settings, at that point Backup and sync, and you can pick how regularly – and by which strategy – you wish to reinforce your photographs. We suggest backing up as frequently as could really be expected, obviously. For a total guide on the best way to utilize Google Photos, hit the connection. To keep your data saved turn on the backup. As shown in the picture below with a black circle.
Have you had any tragic information misfortune mishaps previously? How did you deal with recover erased photographs on Android? do comment below.
Other Option
Do you want other options for getting that picture back from your phone or tablet? Consider where duplicates of it very well maybe. It’s all about the mind at the end. Think!!!
- Did you email or text it to a companion? Request that they send it back!
- Did you post it via online media? You can download it from that point. For instance, on Facebook open the photograph, right-click on it, and select save picture as at that point experience the typical interaction to save the record to your PC. It’s really easy.
- Did you back it up utilizing Google Photos, Dropbox, Carbonite, or another reinforcement process? These processes have methods of reestablishing your reports. For instance, the interaction in Google Photos is equivalent to the one for Facebook depicted previously.
Conclusion:
Well, hope all this worked for you very well. But in the future be careful and mindful of things around you so that in the future you don’t commit the same error again and again.
Check out? How to Delete Your Pinterest Account Permanently?
PTA Taxes Portal
Find PTA Taxes on All Phones on a Single Page using the PhoneWorld PTA Taxes Portal
Explore NowFollow us on Google News!