How to Renew your Expired CNIC through NADRA’s Online Service?
Step by Step Guide to Renew Your Pakistani ID Card Online!
The National Database and Registration Authority, commonly known as Nadra, is an independent and sovereign authority which comes under the Ministry of Interior, Government of Pakistan. It regulates government databases and statistically manages the sensitive registration database of all the national citizens of Pakistan. NADRA has gained international recognition for its success in providing long term solutions for the identification of citizens. The agency has an online service as well.
How to Renew your Expired CNIC through NADRA’s online service
The NADRA online service offers you a wide range of things. Like, you can apply for a new CNIC. And also renew your expired National Identity card. Though, in this article, I will be only focusing on renewal mechanism of CNIC. There are some FAQs which you must read. The process consists of different steps. I am going to quote all the steps one by one. So, you can have a better understanding of it.
The steps for renewal of CNIC are given below:
Step 1:

First, visit the official website of NADRA for registration. By typing the URL, https://id.nadra.gov.pk/. After entering the website, you will see different small black blocks with different domains. Now, click on the block which i have highlighted by the red rectangle.
Step 2:
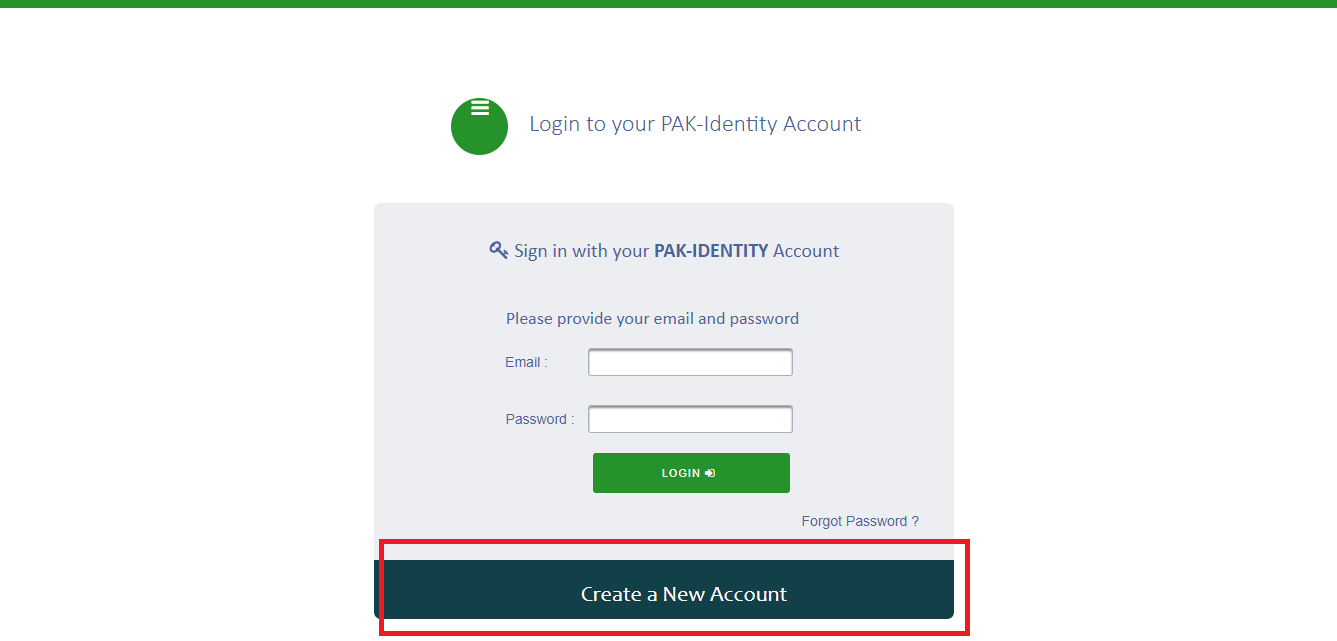
After pressing the block (Apply now), a sign-in page will open. As you can see in the picture. Now, the persons who already have an account can directly log in and proceed further. But, the individuals who don’t have any account will have to make a new account. And to proceed further, they must click on the block which is highlighted as you can see in the picture.
Step 3:
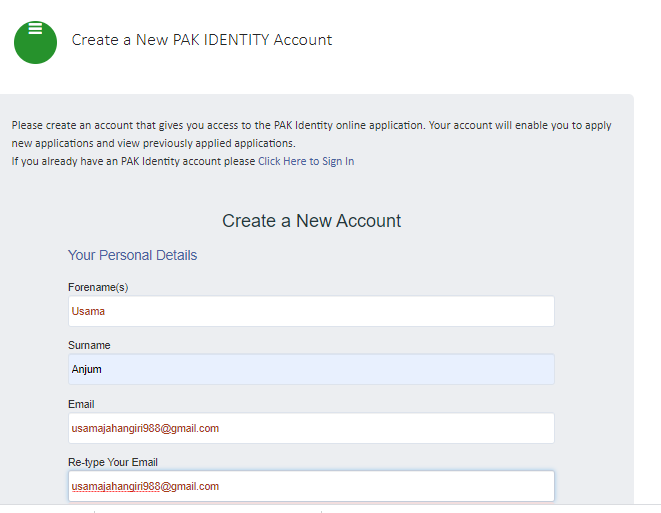
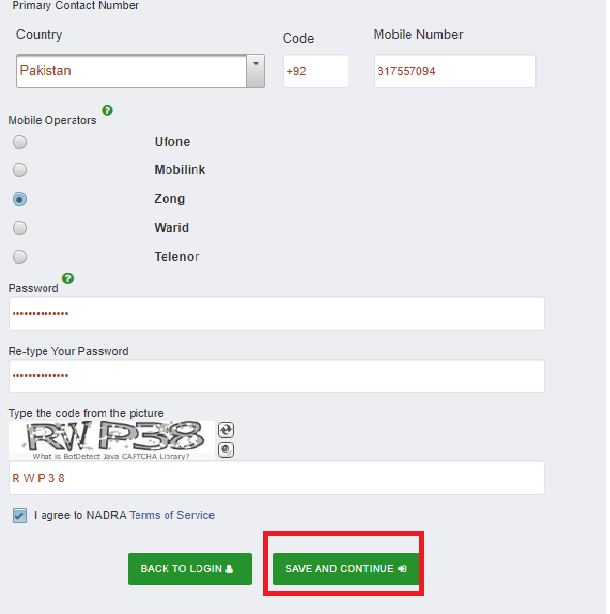
After clicking the the highlighted block, a sign up page will open up. Now as you can see on your screens, you have to right your official name, surname, Email and contact number with country code. An sms will be sent to you with a pin code. After providing all the data, you should read Terms of Service before agreeing to it. And then you can click on the the block highlighted by the red rectangle. And it will then proceed to the next phase.
Step 4:
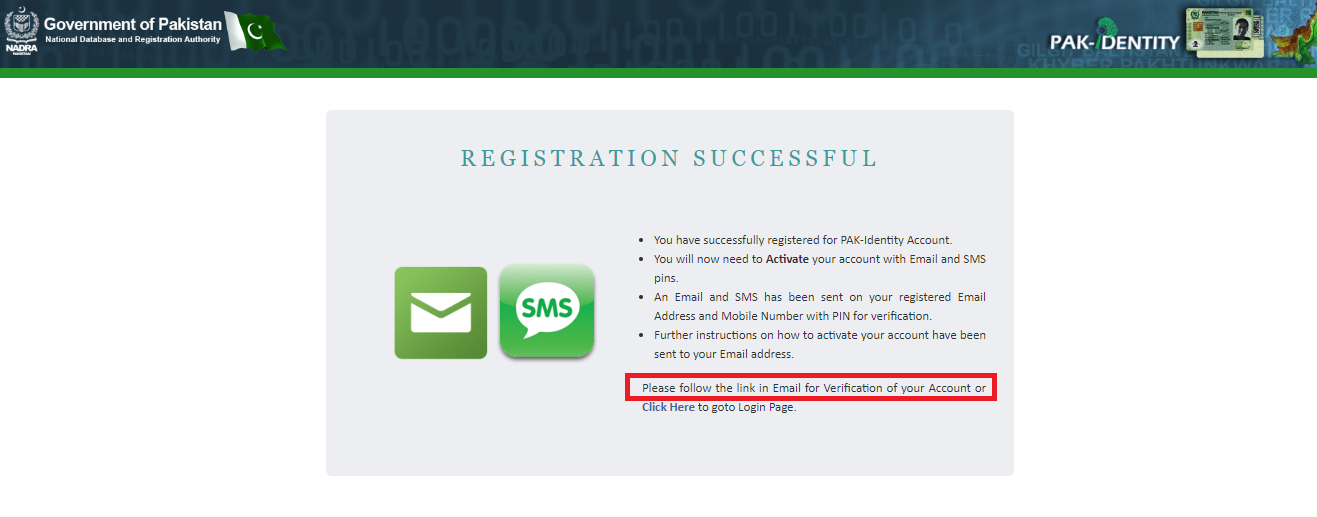
After providing authentic data, you will be successfully registered for Pak-Identity account. The above mentioned photo has a highlighted part which is providing information for further proceeding. An email will be send for further verification.
Step 5:
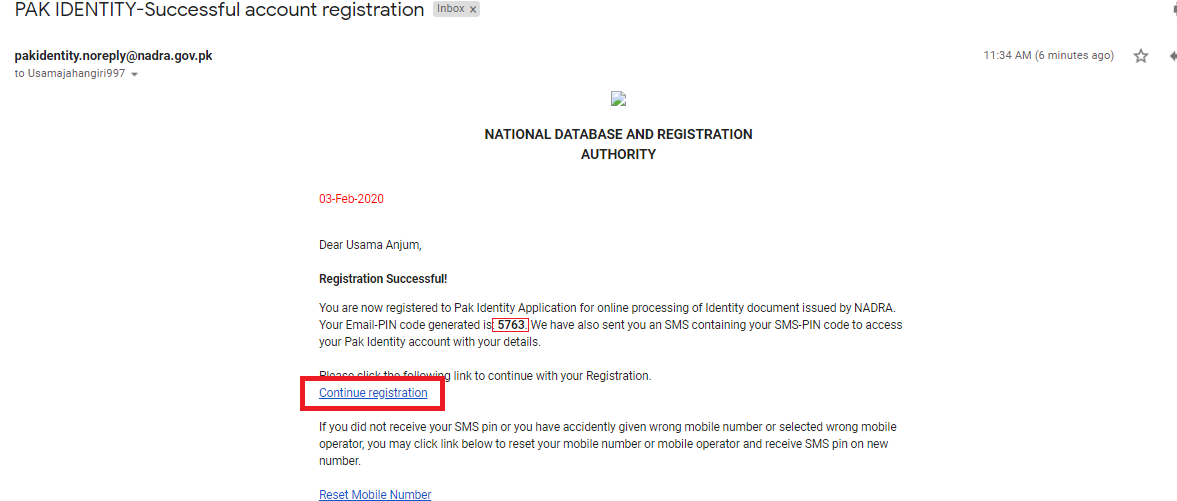
An email will be see sent to you as you can see it in the picture. A similar type of pin code as I have highlighted in my email will be provided. You can copy it. Afterwards, press continue registration which is also highlighted.
Step 6:
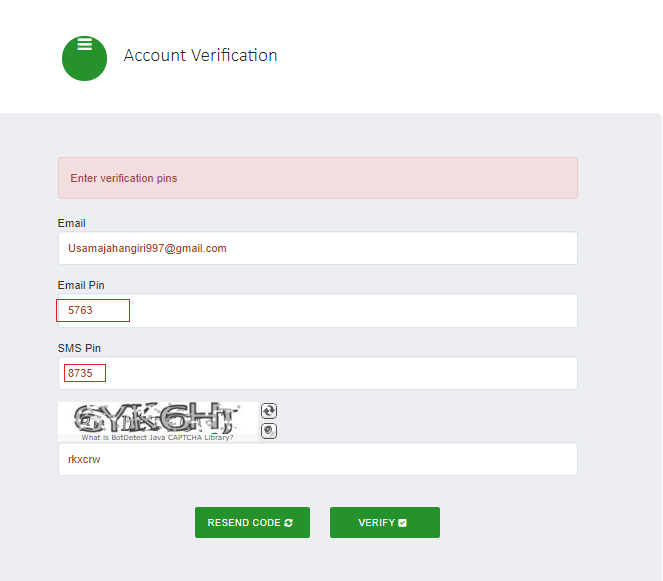
The sixth step will be the main verification phase. As you can observe in the above given picture. You have to provide two verification codes which have already been sent. One on email and the other one on your cellphone. After inserting the codes and captcha, you can move to the next step by clicking verify.
Step 7:
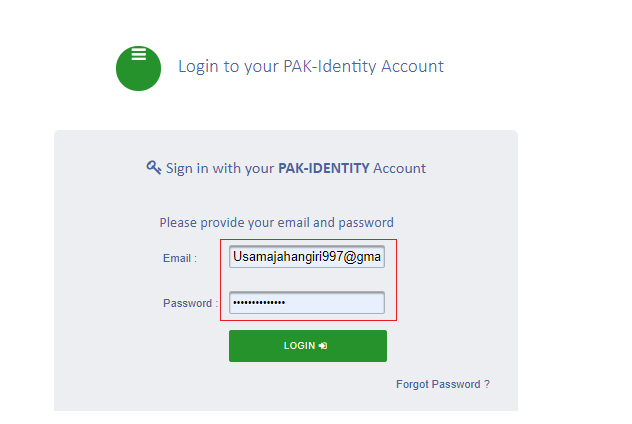
When your account will be verfied, then you log in to PAK-Identity website. It is evident in the given picture.
Step 8:
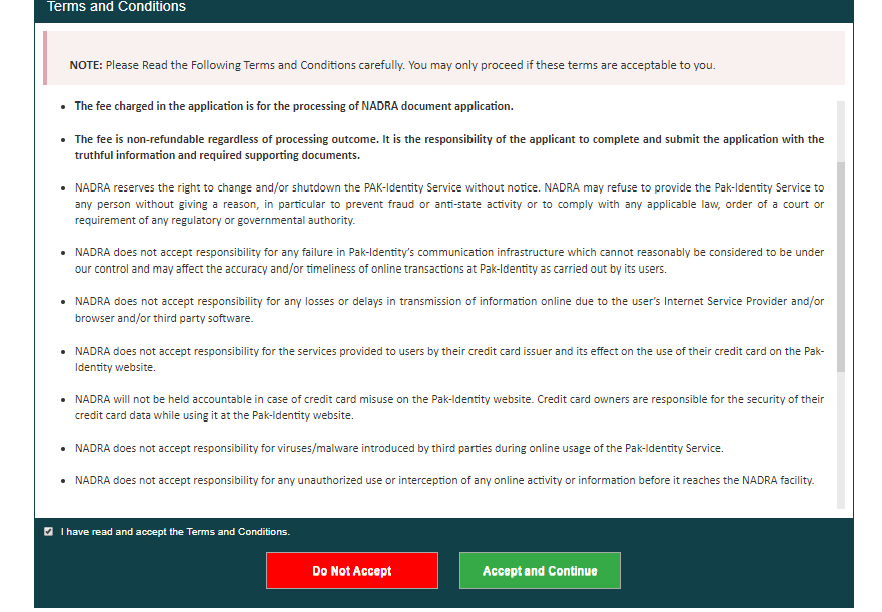
This photo contains all the terms and conditions regarding fee etc. After reading those, you can proceed further pressing the green block at the corner of the picture.
Step 9:
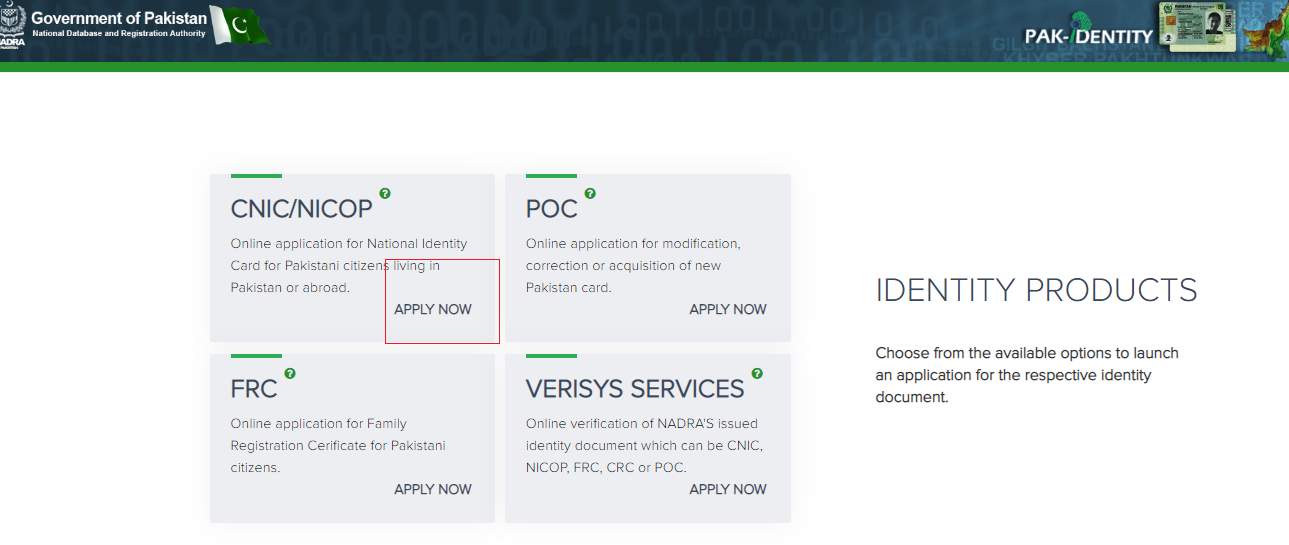
Finally, your account will be logged in. The window which will appear as you can see in the picture has our blocks. But you have you to click on the highlighted one.
Check out? PSEB Facilitates Local Companies to Promote IT Services by Marketing & Subsidization
Step 10:
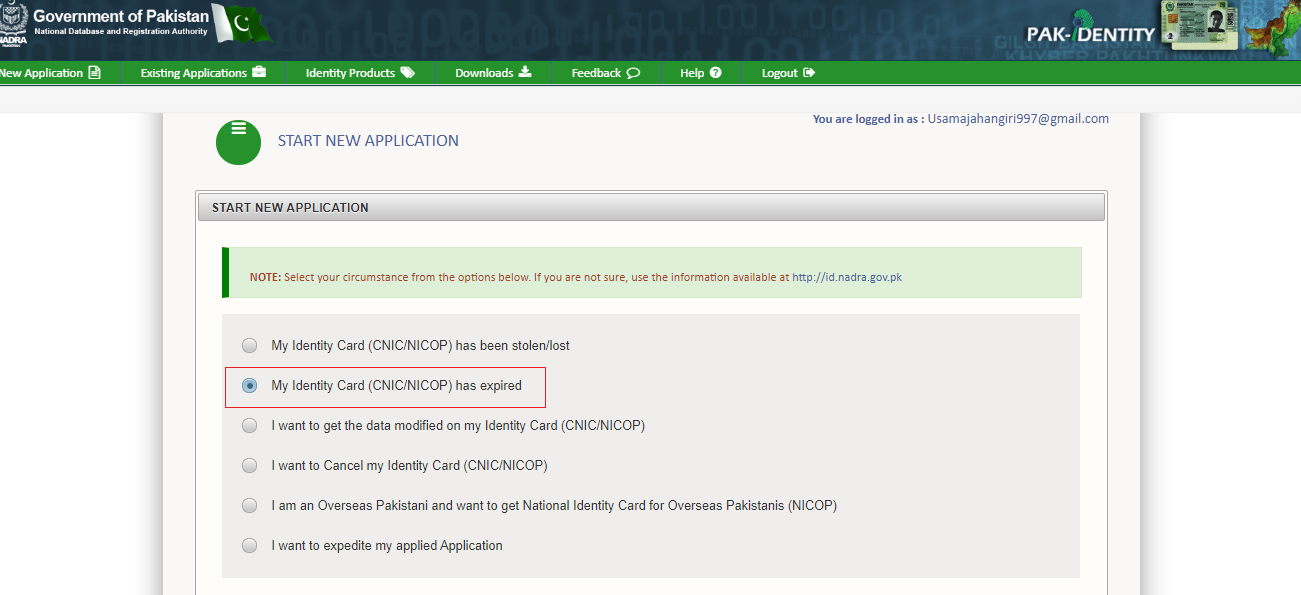
A new window will open up and will be comprising of a list with different issues related to CNIC. As the picture suggests, i chose the second option which is being highlighted.
Step 11:
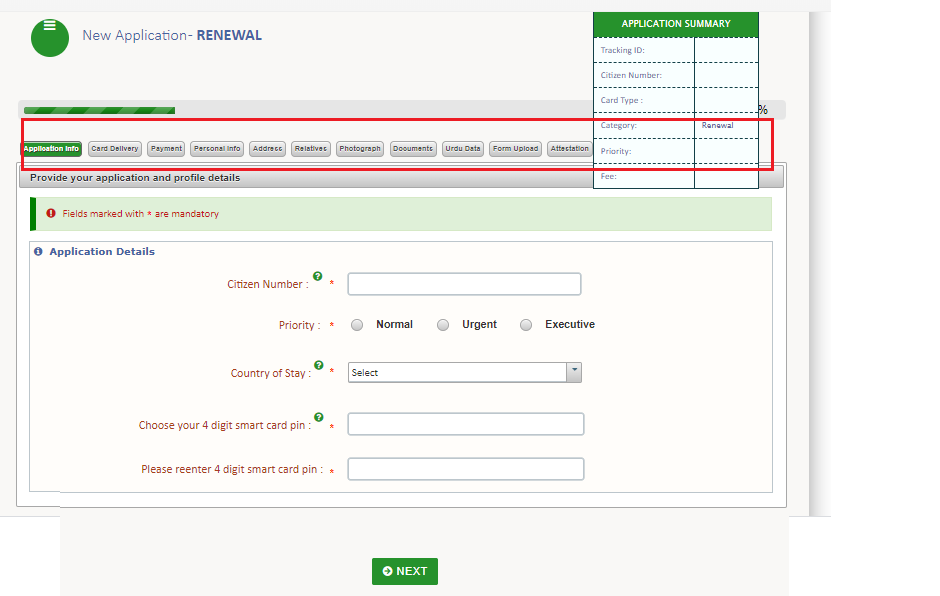
After selecting the issue, a new application renewal will open up. It is comprised of many sub steps as you can see in the photo, highlighted by the red rectangle. I have given the description in form of points given below.
- Provide application details
- Write your address for card delivery
- Pay application fee online with your Credit Card/Debit Card. (Fee structure)
- Give details for the following:
-
- Personal
- Spouse / Parents
- Relatives
- Modify your national identity data (not compulsory)
- Upload your scanned photograph (photograph tutorial)
- Upload the scanned supporting documents
- Download and print the special fingerprint form on A4/Letter page size.
-
- Capture your fingerprints on this form with the help of the fingerprint tutorial.
- Scan and upload the fingerprint form.
-
- Scan quality must be a minimum of 600 dpi in Grayscale.
- Download and fill the Urdu acquisition form according to form-filling tutorial.
-
- If you are applying from outside Pakistan then please download and fill the witness form instead. Provide details of two witnesses on it. Each witness must be a valid NICOP holder.
- Scan and upload the Urdu acquisition form (and the witness form if applicable
- Review the information you provided and sign the declaration
Once you have completed the online application with all pre-requisite documents, photograph, fingerprint document and Urdu acquisition form, NADRA will begin processing your National Identity card. The least estimated time for card delivery is provided in the table.
| ESTIMATED DELIVERY TIME | |
|---|---|
| Application Stage | Minimum Time Required |
| Application Process | 7 Working Days |
| Local Shipping in Pakistan | 2 Working Days |
| International Shipping | 5 Working Days |
PTA Taxes Portal
Find PTA Taxes on All Phones on a Single Page using the PhoneWorld PTA Taxes Portal
Explore NowFollow us on Google News!