How to Resize a JPEG on a Mac? Here’s a Step-by-Step guide
Preview, a free image editor that comes pre-installed on Apple iOS X. Without needing to install any extra software, this built-in app makes it easy to crop and resize a JPEG on mac.
Resizing images will help you handle your visual media, whether you want to save room in your saved photos folder or just want a social-media friendly shot. Images aren’t always comes in a desired sizes. If you’ve imported one from the web or taken one yourself with the hope of having it for a project, you’ll probably need to resize it to meet your requirements.
However, aspect ratios aren’t the only thing to be concerned about. If we want to send the picture out in an email campaign, post it on social media, or include it in a presentation, we’ll need to resize it, so that it would not wreak havoc on other people’s network connections and devices.
Here’s what you need to learn about how to reduce file of JPEG on Mac, whether you’re working with a single image or a set. Learn how to use Preview to monitor the scale of your images, erase unnecessary areas, and adjust the resolution for different purposes.
How To Resize JPEG Files On Mac
On a Mac, you have two simple options to reduce the JPEG file size: the regular Preview application or the PhotoBulk.
Preview is an app that comes pre-installed on your Mac and is mostly used to view images. However, it’s also a powerful medium for editing files, like resizing them. From the amount of pixels to the dimensions in inches, Preview gives you complete leverage. You may also go absolutely custom or convert the picture as a percentage of the original. Finally, the app allows you to crop images to a variety of preset sizes, like 640 x 480 pixels.
There are a few things you’ll need to do before you can start resizing your photos. To begin, use your Finder (the half-toned face icon in your bottom toolbar) to locate the picture or images on your MacBook.
Select your picture or photos in Finder, or move your mouse over the photo or photos on your screen to highlight the single or several images at once.
Step 1:
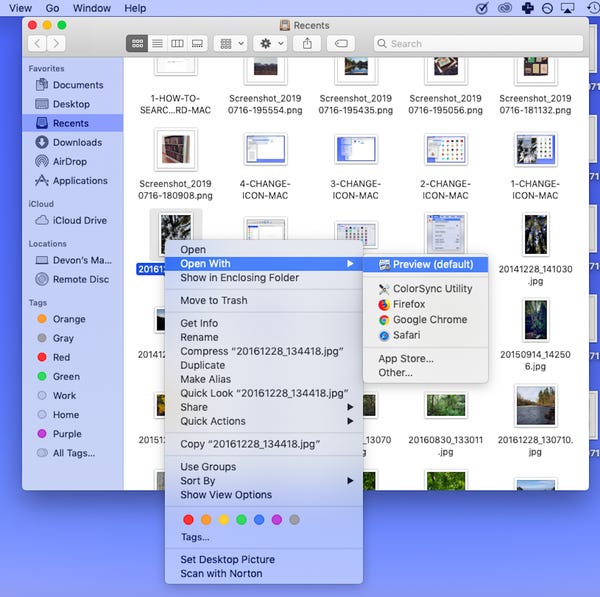
By right-clicking and selecting “Open,” you will open your picture or images in ‘Preview’. If that isn’t your default app, right-click the photo or images you want to preview, then click over “Open with” and then “Preview.”
Step 2:
Select ‘Tools’ from the menu bar.
Step 3:
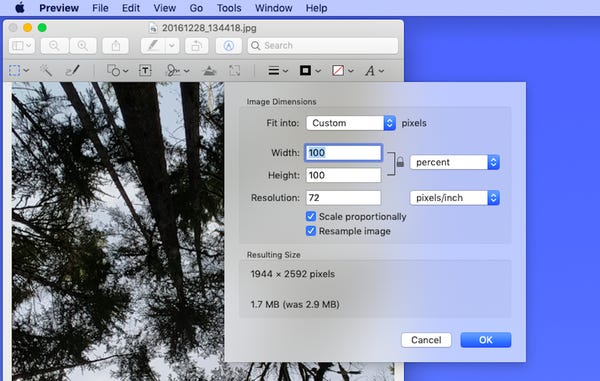
Click ‘Adjust size’ (you can also open this menu by clicking on the square with arrows icon in the menu bar). Now, assuming you want your JPEG image to appear the same after – rather than stretched or squat – you must pick Scale evenly. This assumes you will only shift one dimension, such as length or width, but everything else will be changed in the same way.
Step 4:
Press ‘OK’
Step 5:
Click “File” in the top toolbar, then “Save” to save the new dimensions.
How to Use PhotoBulk to reduce a JPEG file size on Mac
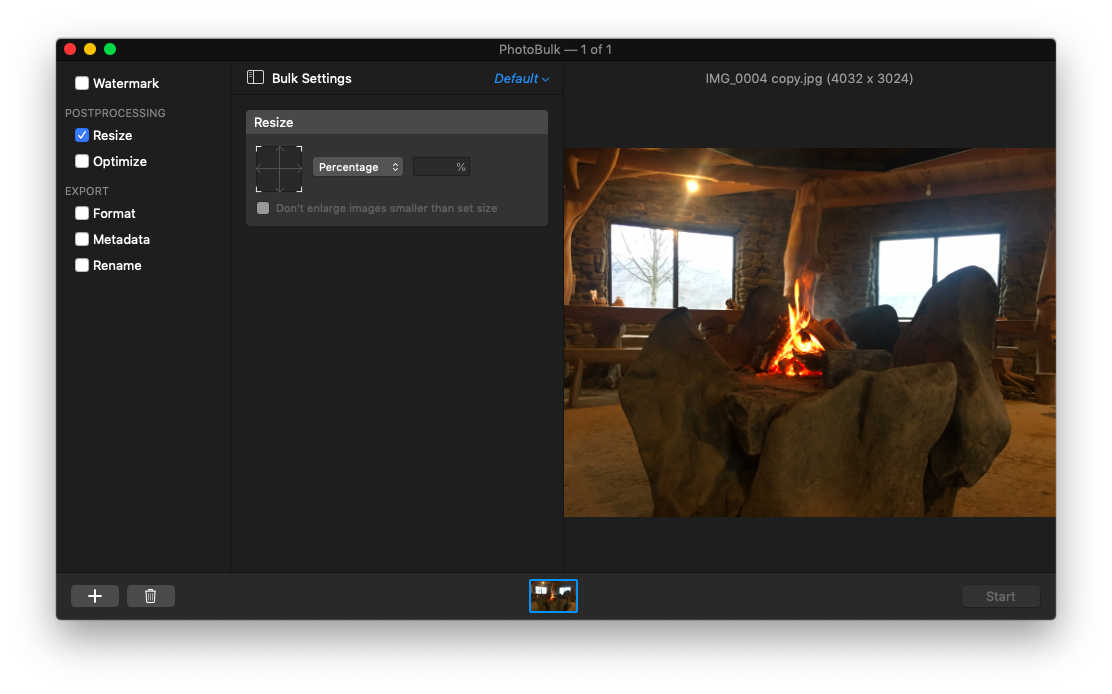
Another alternative is to use PhotoBulk, an image editor designed for bulk resizing but capable of resizing individual images as well. PhotoBulk consolidates all menu options into a single browser, complete with a real-time display feature and the ability to add watermarks simultaneously.
To reduce JPEG image size in PhotoBulk, follow these steps:
- Start the app.
- Insert the picture in the window by dragging and dropping it.
- From the menu icon, choose Resize.
- Choose the resizing method you need.
- Click ‘Start’
How to reduce JPEG file size on Mac using iPhoto
It’s likely if you already have iPhoto if you’re using an older Mac that isn’t compliant with the current macOS. So, for those of you with older Macs, here’s how to reduce JPEG on Mac using iPhoto.
If you want to resize a picture in iPhoto, it must first be in your library. This is already done if you use iPhoto to download photos from an iPhone or digital camera.
If you’re taking an image from the internet, dragging it through an iPhoto window is the easiest way to import it.
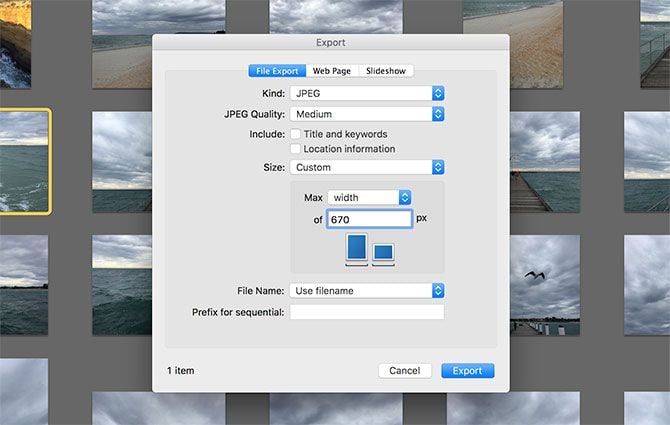
You can then export and resize JPEG on Mac as required once it’s in your library. You won’t be able to extend the picture unnaturally because iPhoto will keep the aspect ratio. Follow these simple steps:
- Open iPhoto and find the picture you want to use.
- Select File > Export from the File menu.
- You can choose from Full Size, Large, Medium, or Small presets under Size. You can choose your own size of Custom (in pixels).
- Choose Custom if you want to define a maximum width or height, or Dimension if you want.
- Restrict both width and height to a certain amount.
- Select Export and a location for the picture to be saved.
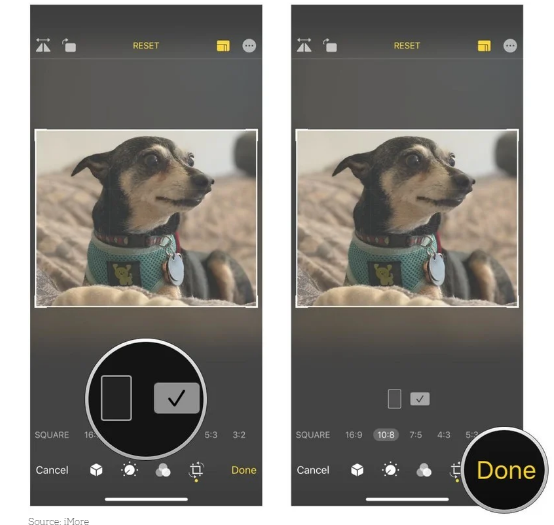
How to crop photos on Mac
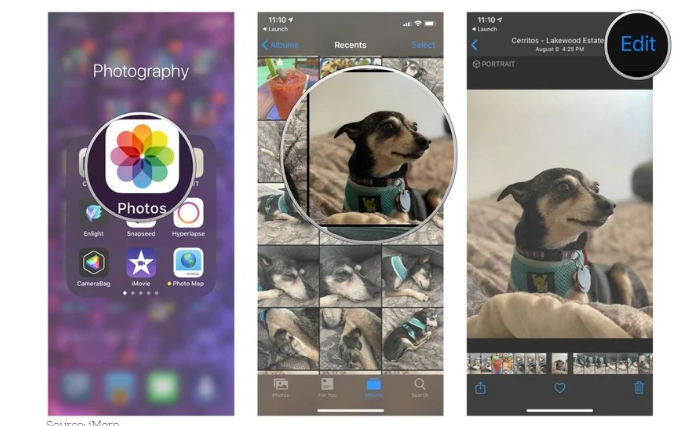
- Open the Photos application.
- Select the image you want to crop.
- Select Edit.
4. In the lower right corner, tap the ‘CROP’ tab. It has the appearance of a square with two arrows surrounding it.
5. In the upper right corner, tap the ‘CROP’ box button. It seems to be three rectangles rolled into one.
6. To crop your picture, tap the aspect ratio you want to use.
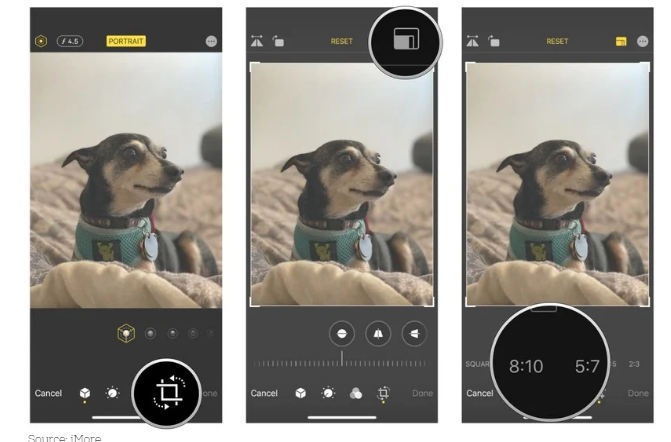
7. Choose between a ‘Vertical and Horizontal crop’.
8. Don’t forget to tap ‘Done’.
Frequently Asked Questions
How do I resize an image in image processing?
Change the width and height of the picture. Using 0 as the value for the wide or high parameter to make the picture size even. Use resize, for example, to change the width of an image to 150 pixels and the height to the same proportion.
How do I edit a JPEG on Mac?
Double-click a picture or video to open it in the Photos application on your Mac, then click Edit in the toolbar. Click and hold the Without Adjustments button, or press and hold the M key, to see the original file. To see the item with edits, release the button or press the M key.
Is there an image editor on a Mac?
The default Mac photo editor, ‘Photos’, is a built-in piece of software that many people overlook, despite the fact that it’s perfect for both beginners and anybody who wants to easily fix their photos in a Mac-provided image editor.
Can you do photo editing on MacBook air?
While most modern MacBooks are powerful enough to edit images with ease, not all MacBooks are created equal, and some MacBooks are better suited for photo editing than others.
Final Words
When you need to resize a JPEG on a Mac, all of these built-in applications will work best for you. You don’t need to buy a pricey app. For example, you may choose to use Preview most of the time but sometimes use the PhotoBulk for resizing method. For single image, you can typically use Preview, and for multiple images, PhotoBulk works best. Only make sure you enter the correct proportions, and save the original if you need a higher-resolution version. Whatever method you choose, there are ways to make the process more easy yet simple.
PTA Taxes Portal
Find PTA Taxes on All Phones on a Single Page using the PhoneWorld PTA Taxes Portal
Explore NowFollow us on Google News!