How to Change Apple ID on iPhone?
There can be times when you want to change your Apple ID and there can be a number of reasons for it. One of the primary reasons for it is that the same Apple ID is also used as an email. So, if your email account has reached too many people and now you are annoyed with endless emails & spam messages, then you will want to change your email. For that purpose, you will also have to change your Apple ID. However, you must be figuring out how to change your Apple ID. Well, you don’t need to worry as we are going to tell you how to change Apple ID on your iPhone.
What is Apple an ID?
An Apple ID is basically an account that provides access to Apple services such as iCloud, Apple Music, the App Store, Apple Pay, and FaceTime. You may also use it to verify yourself on Apple products, such as your iPhone, iPad, and MacBook because it contains your personal information and settings.
Your Apple ID is associated with your email address. It can be a @icloud.com, @me.com, or @mac.com email address. Or, your Apple ID can be an email address, such as [email protected] or any other email address from a third-party provider.
How to Change your Apple ID on your iPhone?
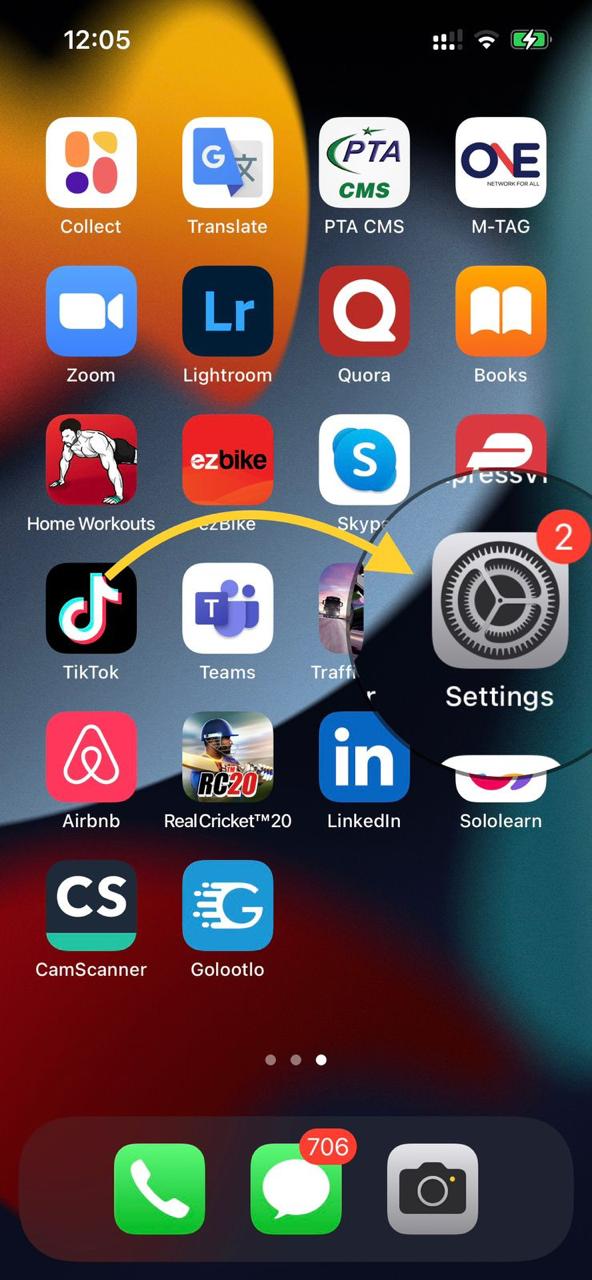
- First of all, visit the settings app on your iPhone.
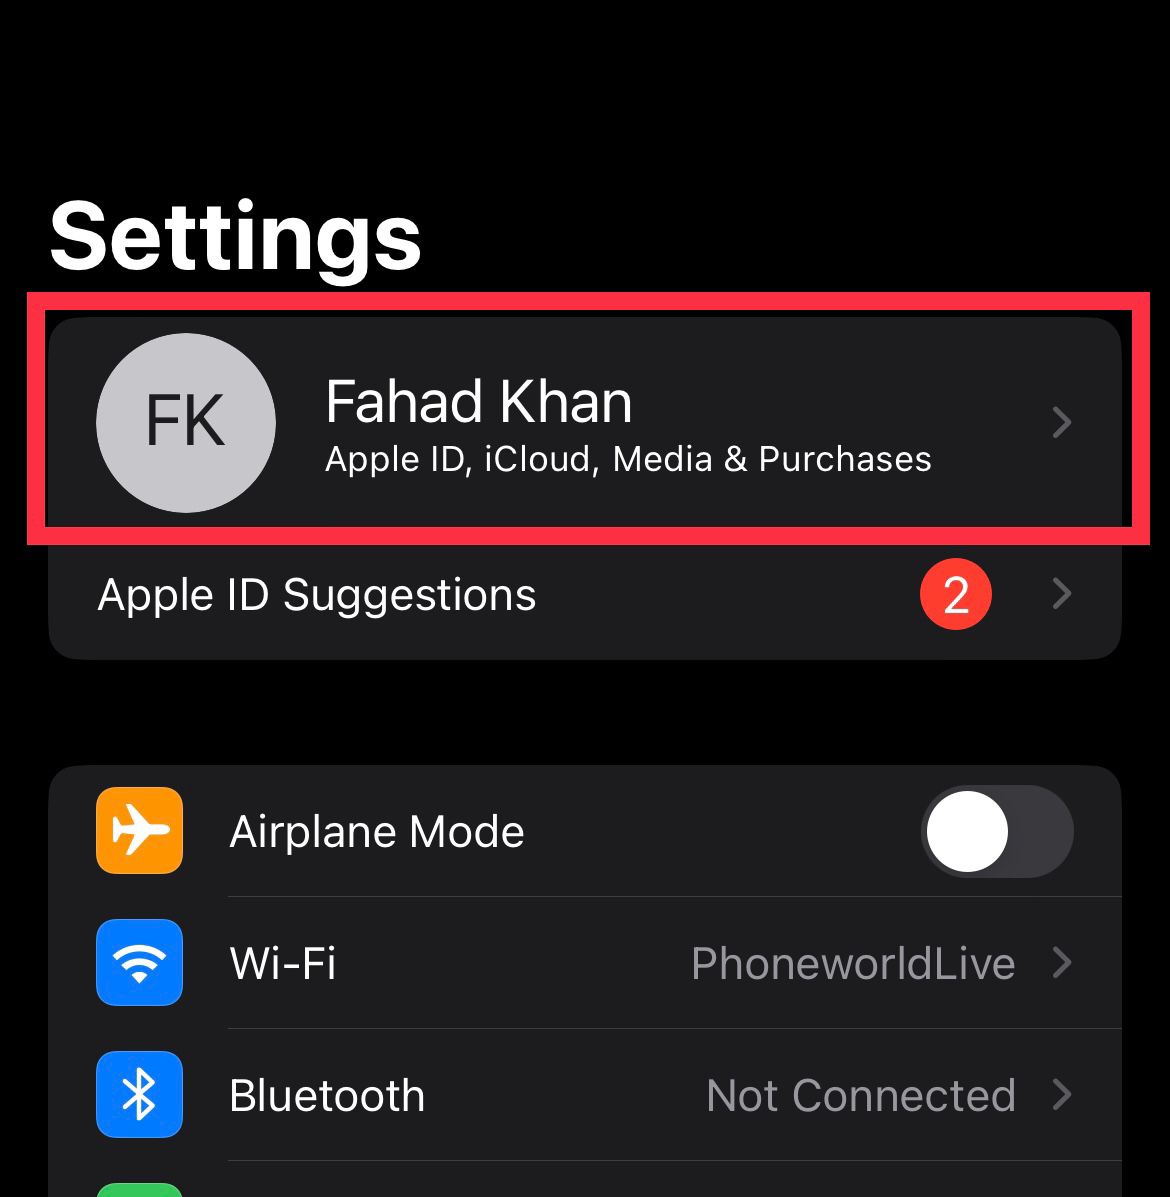
- At the top of the settings app, you will see your name and under it the options of ‘Apple ID, iCloud, Media, & Purchases.’ Click on it as highlighted in the image.
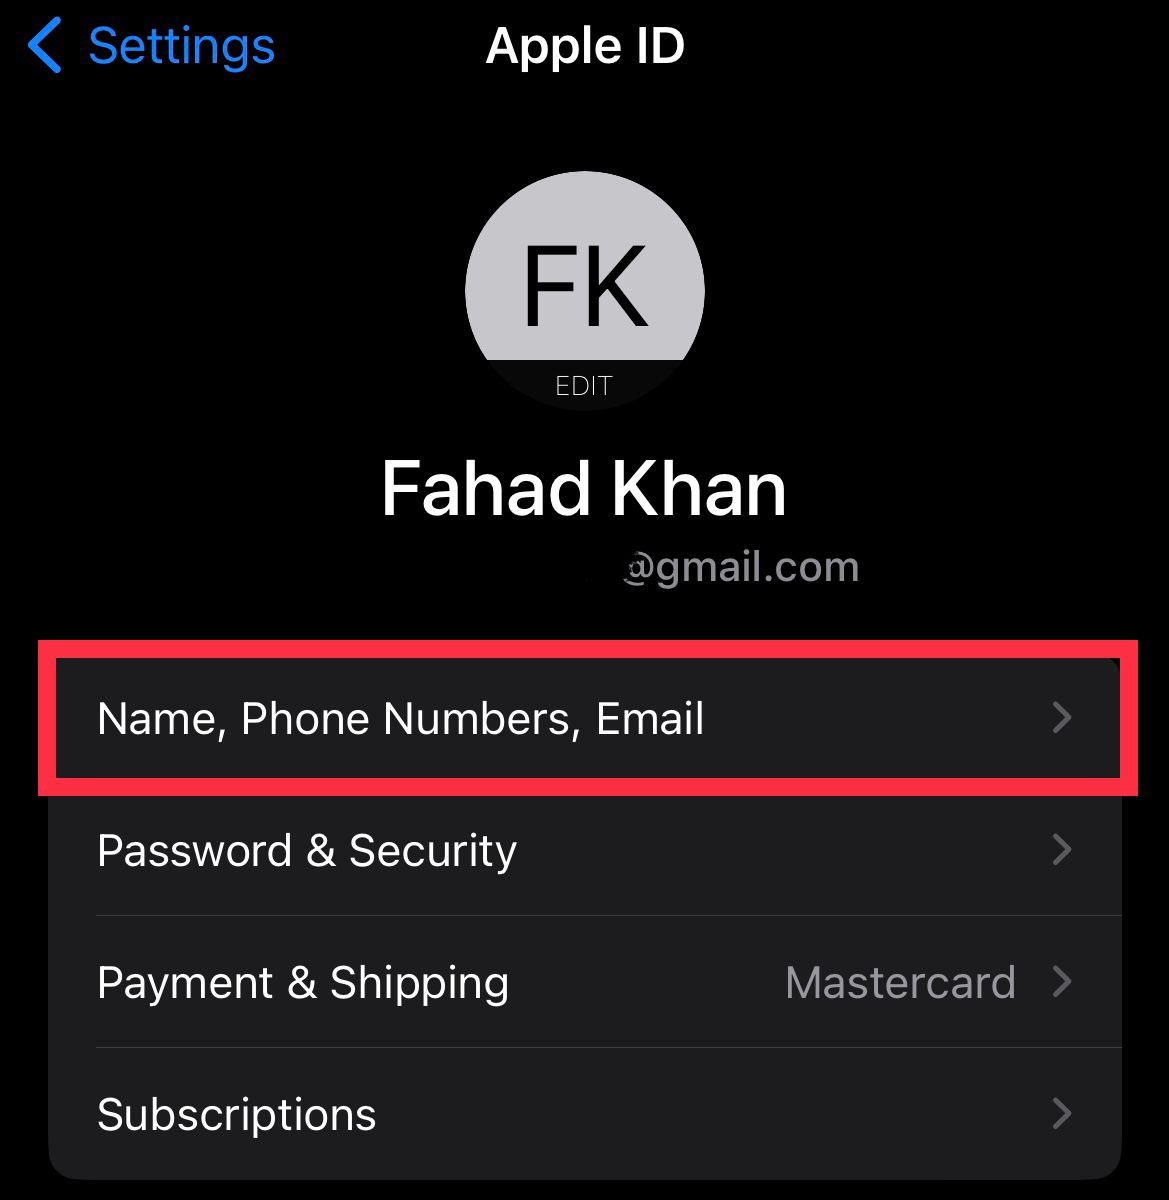
- Now in the next window, tap on the first option of ‘Name, Phone Numbers, Email’ as highlighted in the image.
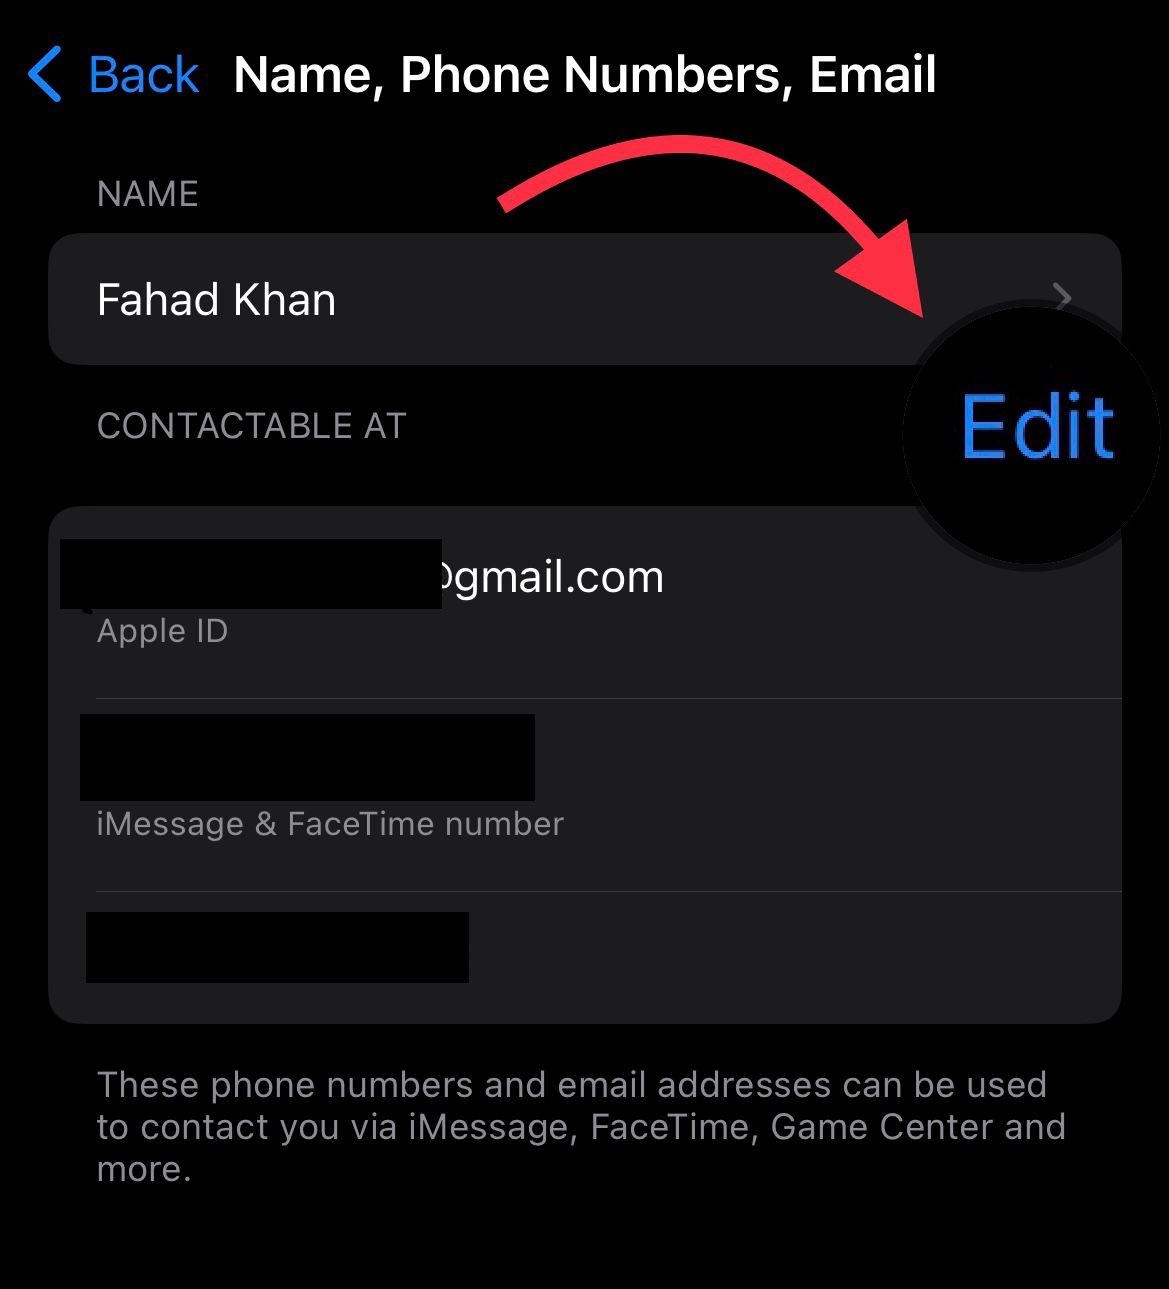
- Afterward, tap in ‘Edit’ as illustrated in the given image.
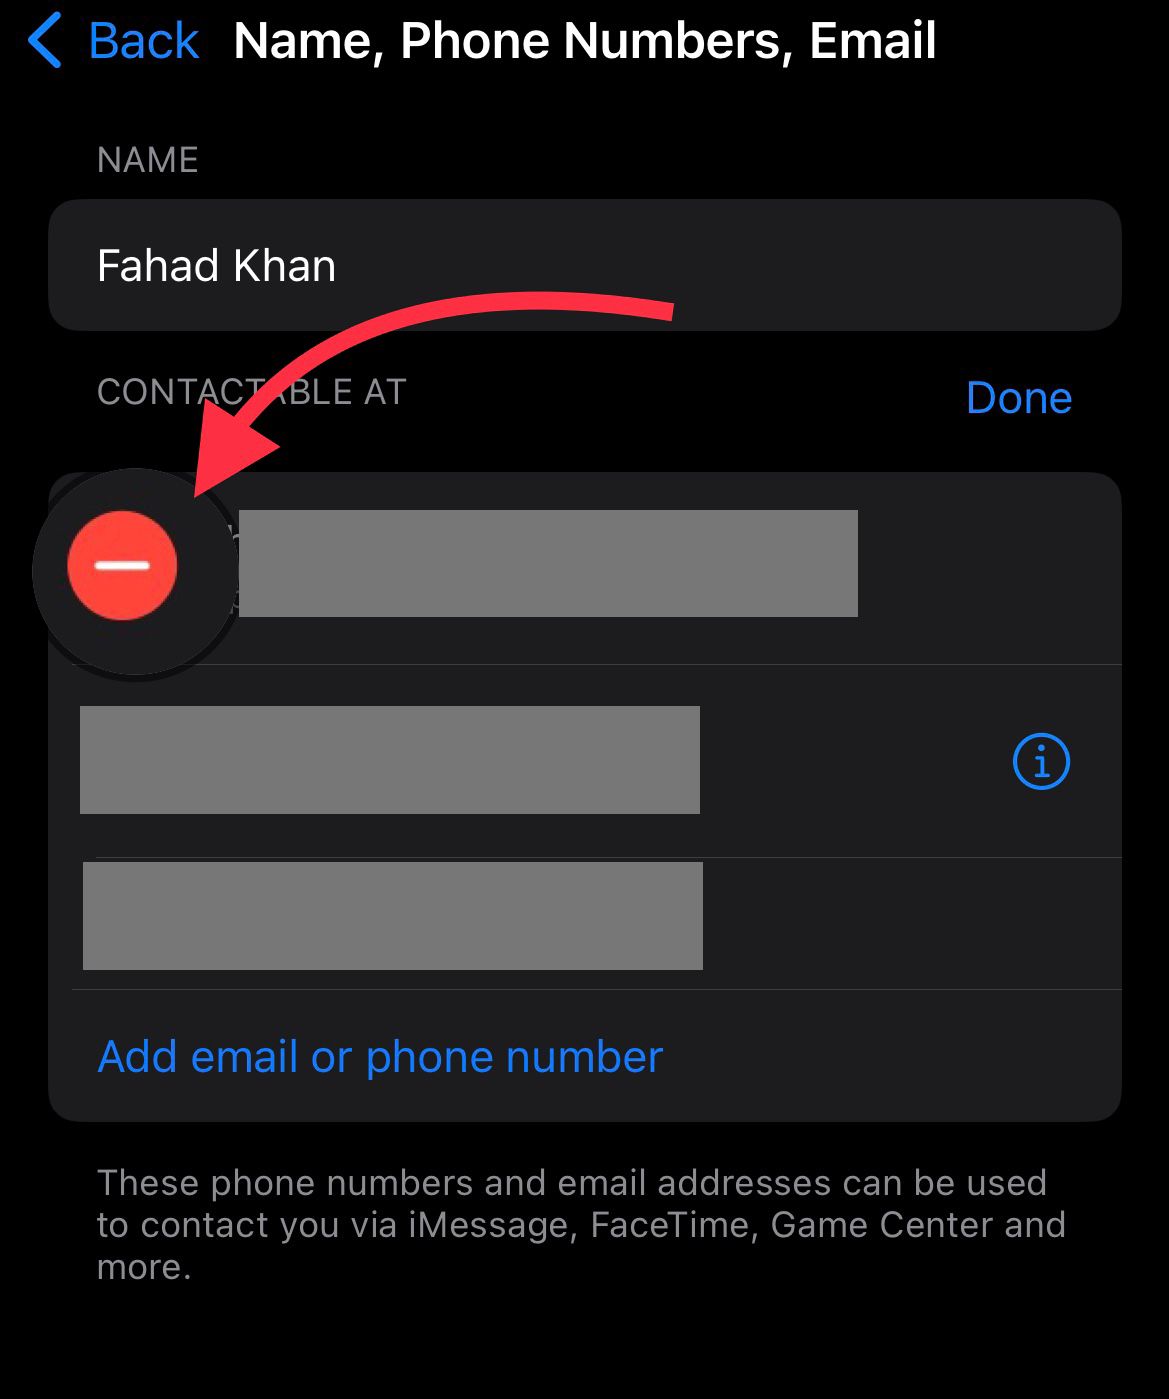
- On the “Name, Phone Numbers, Email” page on your iPhone, you will see a red sign, click on it.
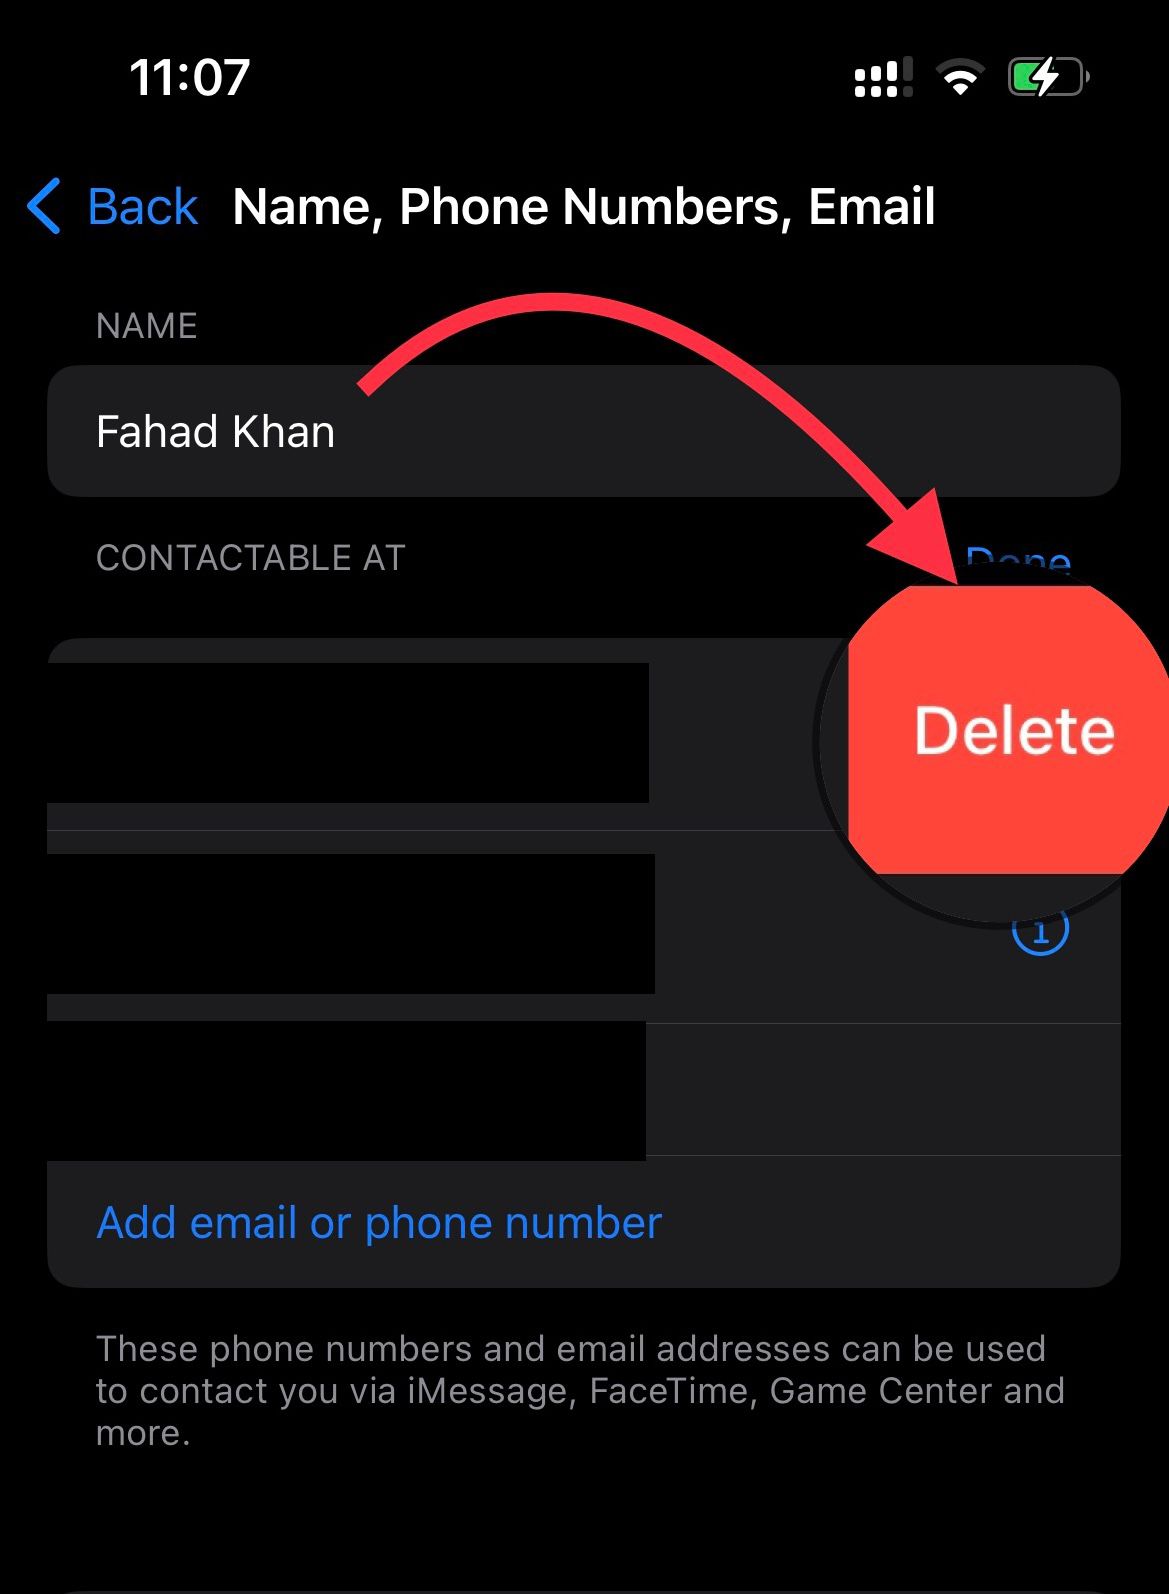
- Now, tap on the ‘delete’ option as you can see in the image.
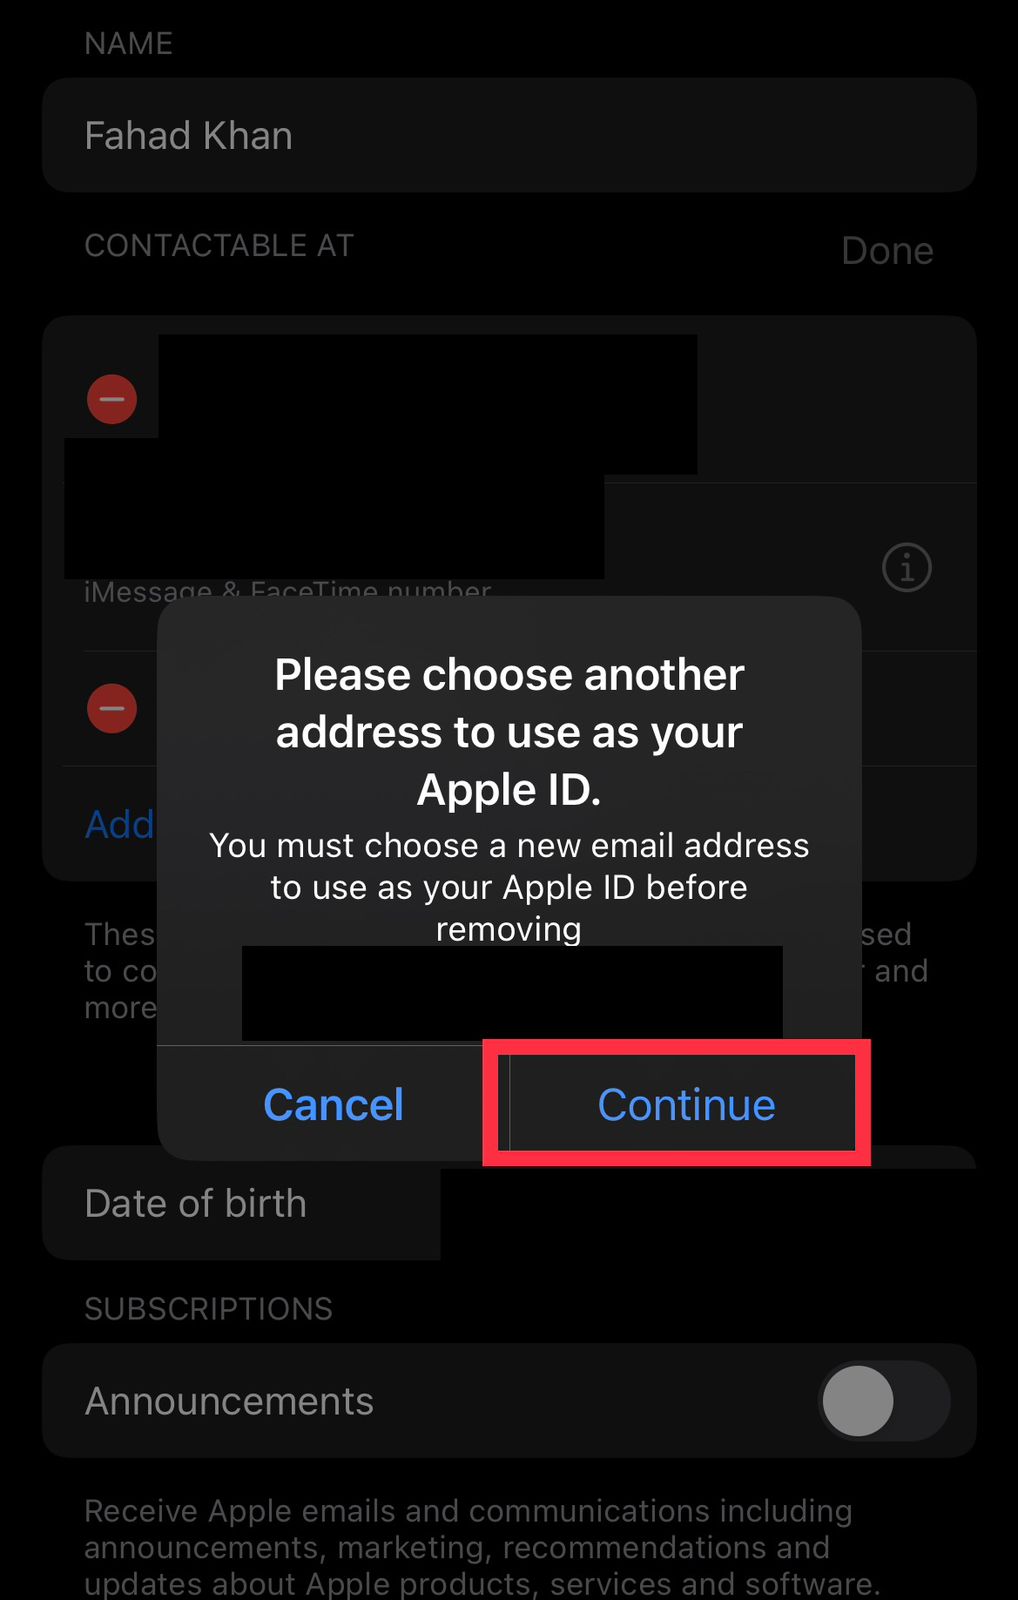
- Afterward, a pop-up will appear asking you to add another email address to use as your Apple ID. Tap on ‘Continue’ as you can see in the image.
Now, you will have to enter your new Apple ID and tap on next. Your entered email will receive a verification code. From your iPhone, take it out of the inbox, and enter it into the pop-up. As soon as you’ve finished inputting the code, your Apple ID will be updated.
How to change your Apple ID to a Different Email Address?
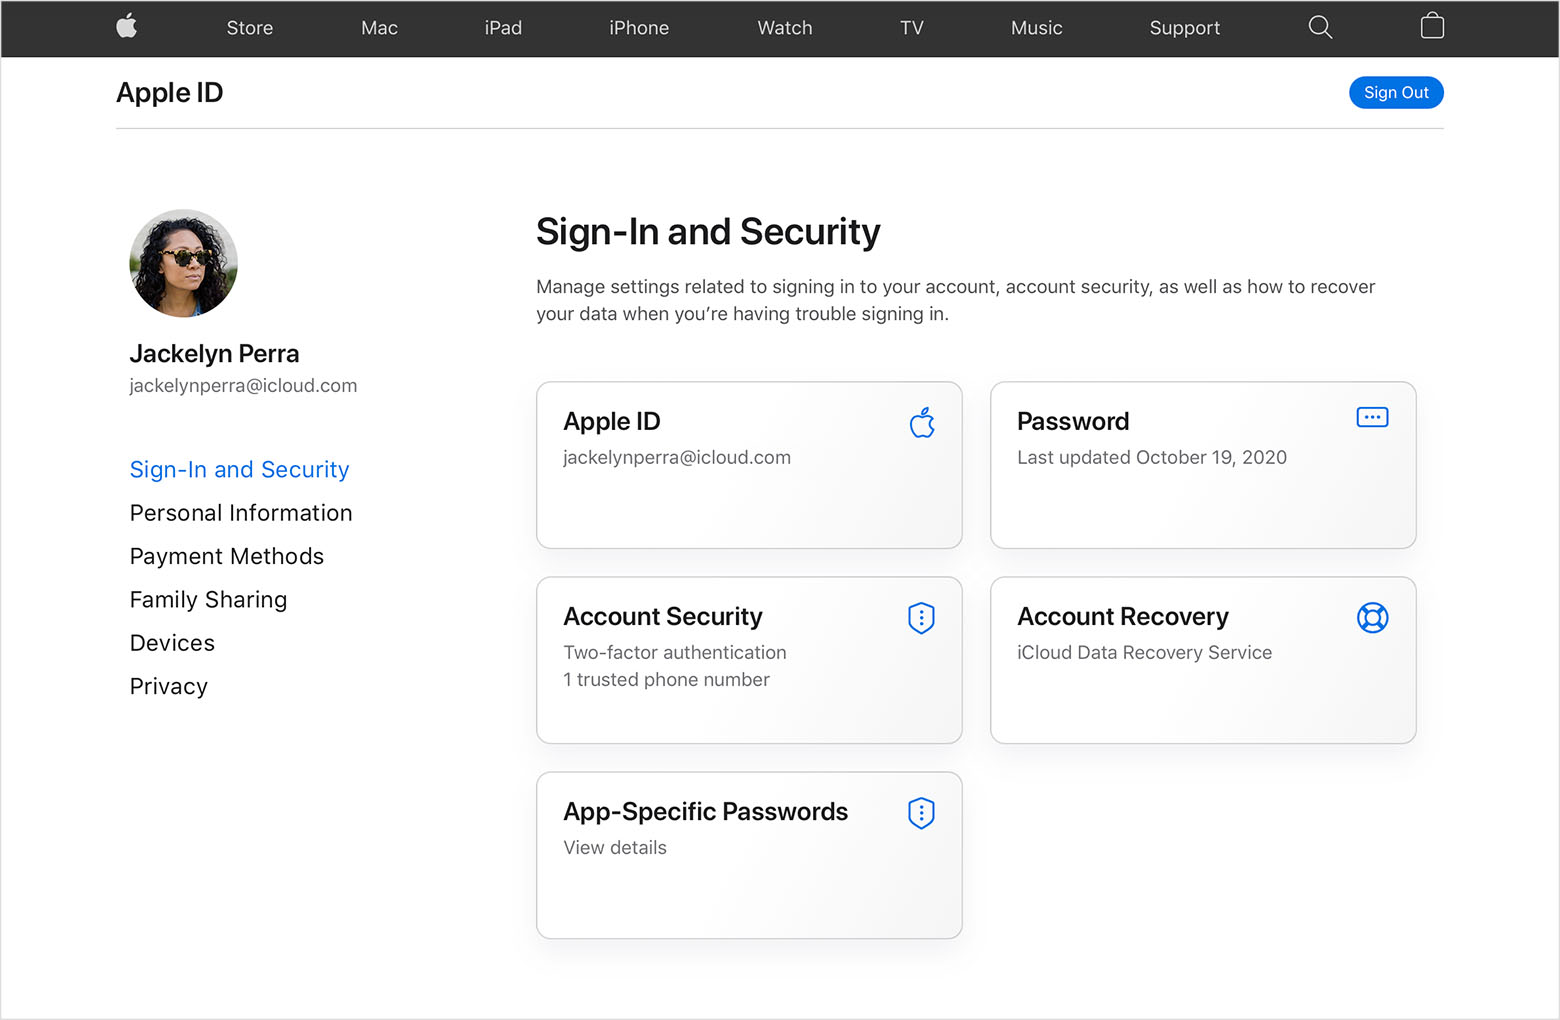
- If your Apple ID is an Apple email address (@icloud.com, @me.com, or @mac.com), you must update it online. For that, you will have to visit appleid.apple.com.
- Afterward, from the Sign-In and Security section, you will have to select Apple ID.
- In the next step, you will need to enter the email address that you wish to use as your Apple ID.
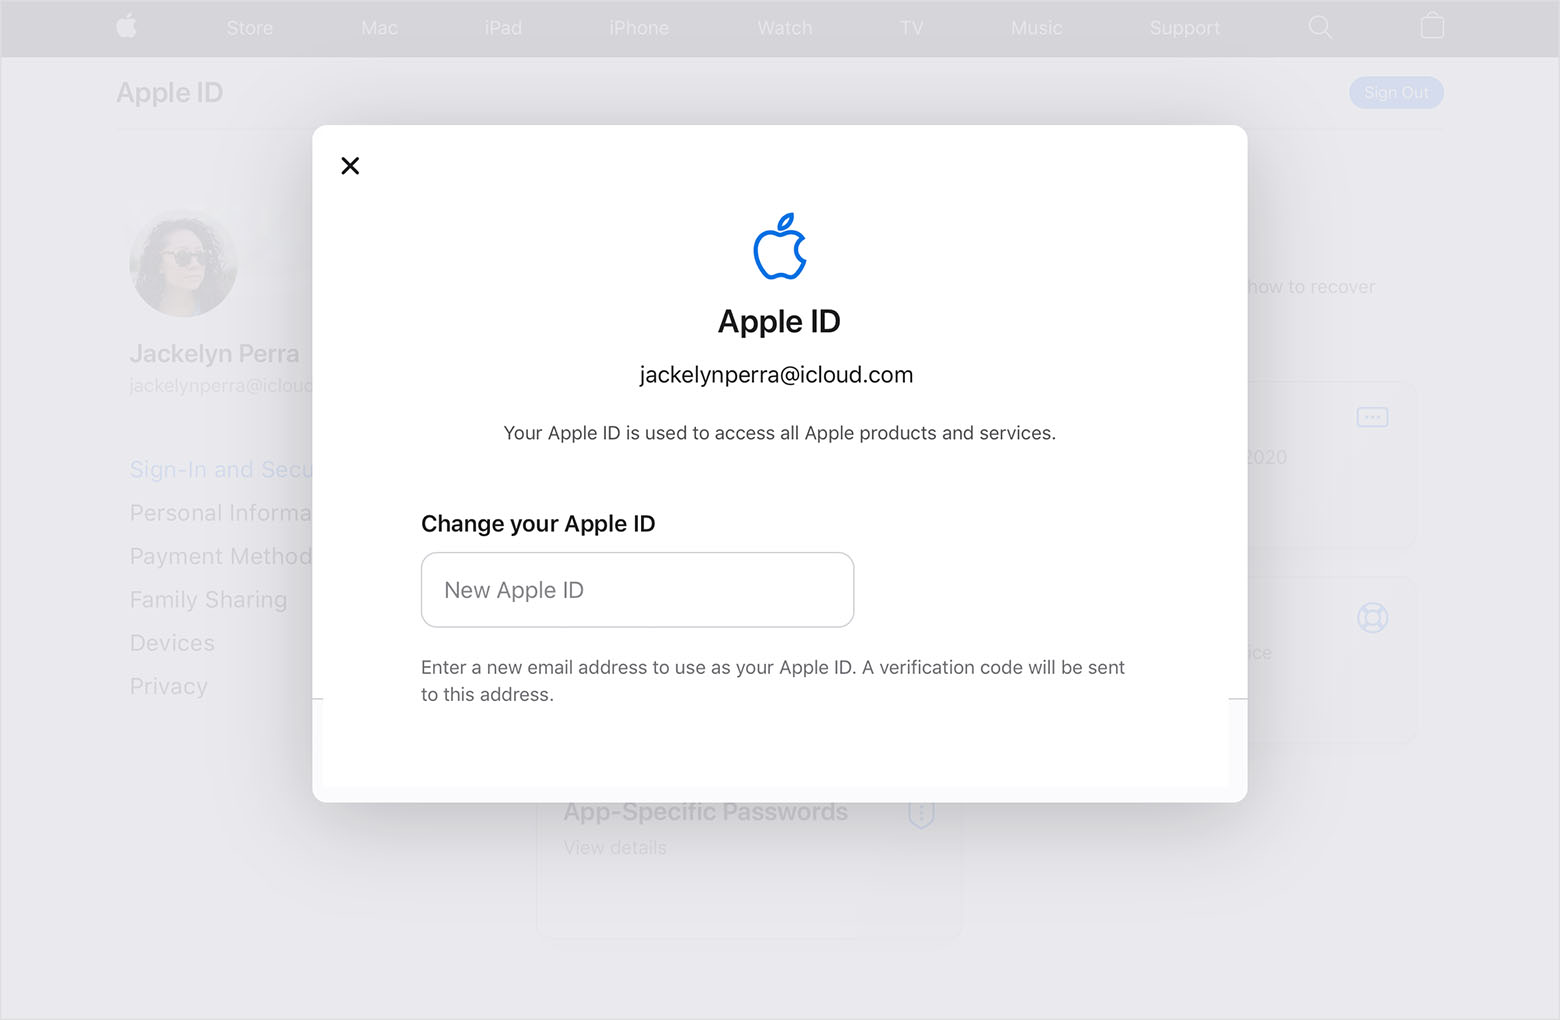
- Now you will have to click on ‘Change Apple ID.
Furthermore, it is pertinent to mention here that if you changed your Apple ID to a third-party email address, then you will have to check your email for a verification code. Then simply, enter the code and your apple will be changed to a different email address.
Points to be Noted While Changing Your Apple ID:
Before changing your Apple ID on your iPhone, you must log out of all sites where you’ve used that ID. This encompasses, your iPad, iPod, Apple TV, Apple HomePod, etc. After changing your Apple ID, you must re-login to all of your devices using the new ID.
Final Words:
We hope that after reading our article you will be able to easily change your Apple ID. If you like our article or have any queries regarding it, do mention them in the comment section!
Check out? Apple Starts Manufacturing iPhone 14 in India
PTA Taxes Portal
Find PTA Taxes on All Phones on a Single Page using the PhoneWorld PTA Taxes Portal
Explore NowFollow us on Google News!